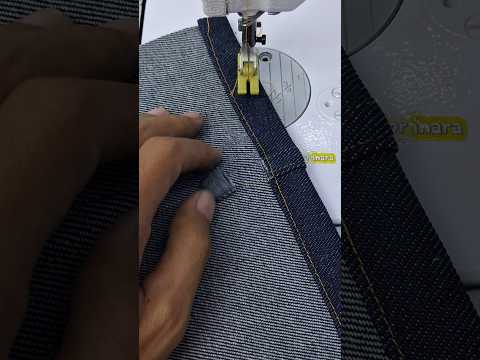
Hemming a pair of jeans is one of the most common alterations, yet it remains one of the most challenging tasks for beginners and seasoned sewists alike. The primary struggle lies in the thickness of the denim, particularly when you reach the side seams. If not handled correctly, you end up with skipped stitches, broken needles, or bulky, uneven corners.
To achieve a professional, "store-bought" finish, you need to focus on how you handle the fabric as it passes through your equipment. Here is how you can get neat and clean results every time.
Why Corner Management is Essential
The secret to a high-quality hem lies in the corners. When you fold denim to create a hem, the thickness at the seams triples. Most standard sewing machinery is designed for flat surfaces, so when the presser foot hits a "mountain" of fabric, it tilts. This tilt is what causes the machine to struggle. By using specific folding techniques and trimming away excess seam allowance inside the fold, you can significantly reduce this bulk before you even start stitching.
Achieving a Clean Stitch
To ensure your results are crisp, always use a dedicated denim needle and heavy-duty thread that matches the original topstitching. As you approach the thickest part of the corner, slow down. A great trick is to use a "hump jumper" or a small piece of folded fabric behind the presser foot to keep it level. This allows the machinery to exert even pressure, resulting in perfectly straight and consistent stitches across the entire circumference of the leg.
The Professional Difference
By taking the time to prep your corners and adjust your tension, your DIY hems will look indistinguishable from a professional tailor's work. Remember, even the most advanced sewing machinery performs best when the fabric is prepared correctly. With these simple tips, you can transform a pair of ill-fitting jeans into a custom-tailored masterpiece with ease. Keep practicing these corner-tucking methods, and you will soon master the art of the perfect denim hem.


