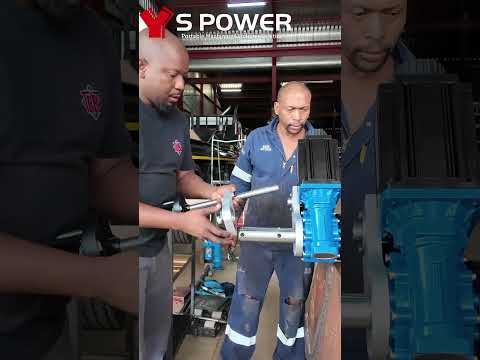
Heavy equipment subject to continuous friction eventually suffers from worn-out pivot points and oversized pin holes. Instead of replacing massive components, field technicians rely on portable line boring and bore welding tools to restore worn bores back to factory specifications. Properly setting up this equipment is essential for maintaining industrial machinery and ensuring precise, durable repairs.
Here is a step-by-step guide on how to correctly set up a portable line boring and bore welder machine for optimal performance.
Step 1: Preparation and Precision Alignment
Before installing any equipment, thoroughly clean the damaged bore to remove grease, rust, and debris.
- Mount Support Plates: Weld mounting plates securely around the bore area on a flat, stable surface.
- Insert the Boring Bar: Slide the precision boring bar through the bore support bearings.
- Center the Bar: Use a centering cone set or a dial indicator to align the bar perfectly with the original bore axis. Precise alignment prevents uneven wear on your machinery components down the line.
Step 2: Setting Up the Portable Line Boring Machine
Once alignment is verified, lock the spherical bearings in place and attach the drive motor.
- Install the Drive Unit: Secure the rotational drive and feed mechanism onto the mounting setup.
- Set the Cutting Tool: Insert the carbide cutting tool into the tool hole on the bar. Measure the desired depth of cut using a micrometer or depth gauge.
- Perform the Pass: Run the machine at the appropriate RPM and feed rate to remove damaged or out-of-round metal, creating a clean, uniform surface ready for welding.
Step 3: Configuring the Automated Bore Welder
After machining out the damaged area, you must build up the surface material using an automated bore welder before final sizing.
- Swap Equipment: Remove the line boring motor while keeping the main alignment setup intact.
- Mount the Bore Welder: Attach the bore welding head directly to the mounting system.
- Adjust Parameters: Connect your MIG welder, shield gas, and power source. Set the rotational speed and step-over distance according to the bore diameter.
- Apply Weld Layers: Begin the automated welding process to evenly deposit material across the inner surface of the bore.
Step 4: Final Boring to Factory Specs
Once the weld cools down completely, re-attach the portable line boring drive unit. Take fine finishing cuts until the bore reaches its exact original internal diameter.
Conclusion
Investing the time in a meticulous setup guarantees seamless repair operations and extends the operational lifespan of heavy machinery. With portable line boring and bore welding setups, on-site repairs become faster, safer, and significantly more cost-effective.


